Email Server Properties
You can access this dialog box from the following places:
- The e-mail node of the Workflow Administration Console.
- The e-mail component of the Configuration Manager.
- The manage e-mail servers link in the advanced e-mail settings of the Email activity, or the same link in the Advanced settings when you Add an e-mail with the Email tab of the Route Entry to User, Route Entry to Group, or Route Entry to Folder activities. In the Referenced Object Manager, click Add or Edit.
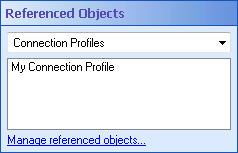
- If you have already configured one or more e-mail servers with a Route Entry to Group, Route Entry to User, Route Entry to Folder, or Email activity, you can configure e-mail servers from the workflow's Referenced Objects property box. (To view and edit this
 property box, select a blank area in the Designer Pane and click the Advanced button
  at the top of the Properties Pane.) Select Email Servers from the drop-down menu, and click the Manage referenced properties link. In the Referenced Object Manager, click Add or Edit.
To add or modify an e-mail server
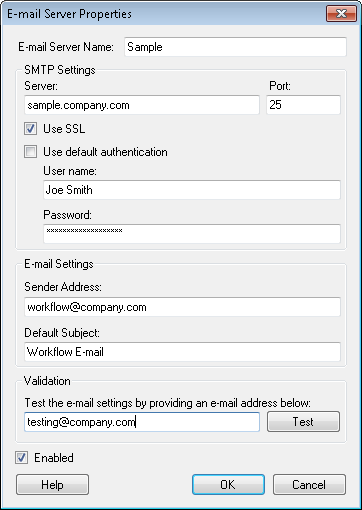
- In the Email Server Properties dialog box, next to Email Server Name, give the server a unique display name. This name is necessary to distinguish between multiple e-mail servers.
- Under SMTP Settings, define your e-mail server and port. Only specify a port if you need to use a non-standard e-mail port. (The standard port is 25, which will be used unless you specify a different port.)
- Optional: Select Use SSL if you want to secure the connection between the Workflow Server and e-mail server.
- Configure your authentication settings.
- Select Use default authentication to authenticate using the same account as the Workflow Server service.
- Clear Use default authentication to specify a user name and password used to authenticate to the e-mail server. (This authentication may be optional because some e-mail servers do not require a user name or password.)
- Under Sender Address, specify an e-mail address. Emails sent from this server will be sent from this address.
- Optional: Provide a default subject for e-mails sent from this e-mail server.
- Optional: In the Validation section, test the settings you configured by providing an e-mail address to send a test e-mail to and clicking Test.
- Select the Enabled checkbox to enable the e-mail server, or clear the Enabled checkbox if you want to disable the e-mail server. You may have multiple e-mail servers and want one disabled while you configure another one.
- When finished, click OK.
- Optional: If you accessed this dialog box from the Workflow Configuration Manager or the Workflow Administration Console, the Email Server Manager dialog box will appear. You can select an existing e-mail server and click Edit to change it, click Delete to remove it, or double-click the green check
 or red X
  in the Enabled column to toggle its status between enabled and disabled.
 - Optional: If you accessed this dialog box from the Workflow Designer, the Referenced Object Manager will appear and you can select an existing e-mail server and click Edit to change it.
- Click Close to exit the Email Server Manager or Referenced Object Manager.
Example: Bob configures his e-mail server's sender address as "workflow@company.com." Every time a workflow sends an e-mail, it will come from this address. Bob monitors this account periodically to see if employees have replied to e-mails sent from Workflow.
To assign a different e-mail server to multiple activities in a workflow
Example: The Human Resources Department has a new e-mail server that Workflow should use to send e-mails. Instead of individually updating each e-mail activity, you can update all the activities at once with the Reassign option.